🧬Day 27 - Jenkins Declarative Pipeline with Docker

Hey there! 👋
I'm Pratik R. Mandge, a DevOps Engineer passionate about all things AWS DevOps Technology. Currently on a learning adventure, I'm here to share my journey and Blog's in the world of cloud and DevOps.
🛠️ My focus? Making sense of AWS services, improving CI/CD, and diving into infrastructure as code. Whether you're fellow interns or curious enthusiasts, let's grow together in the vibrant DevOps space.
🌐 Connect with me for friendly chats, shared experiences, and learning moments. Here's to embracing the learning curve and thriving in the exciting world of AWS DevOps Technology!
Follow me on LinkedIn: https://www.linkedin.com/in/pratik-mandge363
#Day26 was all about a Declarative pipeline, now its time to level up things, let's integrate Docker and your Jenkins declarative pipeline.
🎆Let's Docker Build and Run Knowledge
docker build - Building Docker Images.
In the context of our pipeline, it's like creating a blueprint for your application and packaging it into a standalone image.
stages {
    stage('Build') {
        steps {
            sh 'docker build -t mandgepratik/django-app:latest .'
        }
    }
}
docker run - Run Docker Container.
In our pipeline, it's like deploying your application in an isolated environment.
stages {
    stage('Run') {
        steps {
            sh 'docker run -d mandgepratik/django-app:latest'
        }
    }
}
Now Let's tackle our tasks,
🕹Task 1: Create a Docker-Integrated Jenkins Declarative Pipeline.

🔹For Jenkins Installation You need to Install Java.
sudo apt update    #update system
sudo apt install fontconfig openjdk-17-jre   #Java Installation
🔹Then, Install Jenkins, Docker & Docker-compose.
# Full Installation of Jenkins

sudo wget -O /usr/share/keyrings/jenkins-keyring.asc \
  https://pkg.jenkins.io/debian-stable/jenkins.io-2023.key
echo deb [signed-by=/usr/share/keyrings/jenkins-keyring.asc] \
  https://pkg.jenkins.io/debian-stable binary/ | sudo tee \
  /etc/apt/sources.list.d/jenkins.list > /dev/null
sudo apt-get update
sudo apt-get install jenkins

-----------------------------------------------------------

# Full Installation Of Docker & Docker-Compose

sudo apt-get install docker.io docker-compose -y
🔹Enable Jenkins & Docker
sudo systemctl enable jenkins
sudo systemctl enable docker
🔹Then, Add Users in docker group
sudo usermod -aG docker $USER   #ubuntu user
sudo usermod -aG docker jenkins #Jenkins user
cat /etc/group                  # check both user add or not
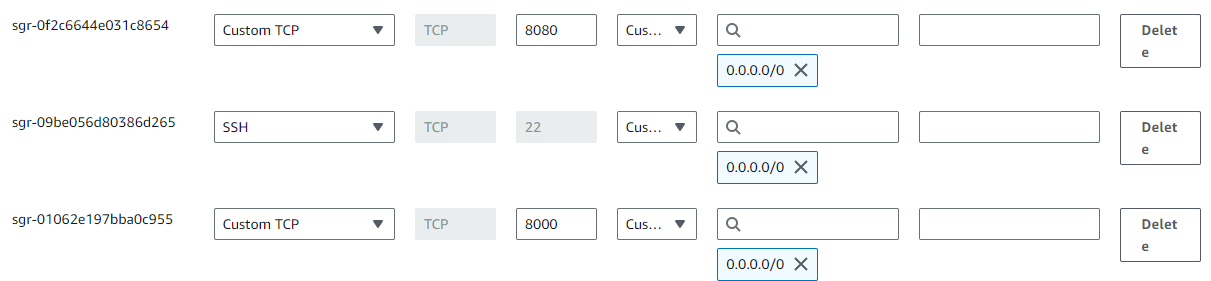
🔹Go to security group, open port 8080 for Jenkins & 8000 for Docker.
🔹Then Access Jenkins Portal using your EC2 public-ip:8080
🔹Now, creating new pipeline job. Go to New Item->Give name of Project->select Pipeline->Click OK.
🔹Go to pipeline, Configure you pipeline.

🔹Go to last, select Pipeline script-> write this script-> Save it.
pipeline {
    agent any

    stages {
        stage("code") {
            steps {
                git url: "https://github.com/mandgepratik/node-todo-cicd.git", branch: "master"
                echo "code cloned successfully"
            }
        }

        stage("build") {
            steps {
                sh 'docker build . -t todo-app'
                echo "code build successfully"
            }
        }

        stage("deploy") {
            steps {
                sh "docker run -p 8000:8000 -d todo-app"
                echo "Node-app deployed successfully"
            }
        }
    }
}
🔹On the Left, Click on Build Now.
🔹On First Click your Pipeline runs successfully.
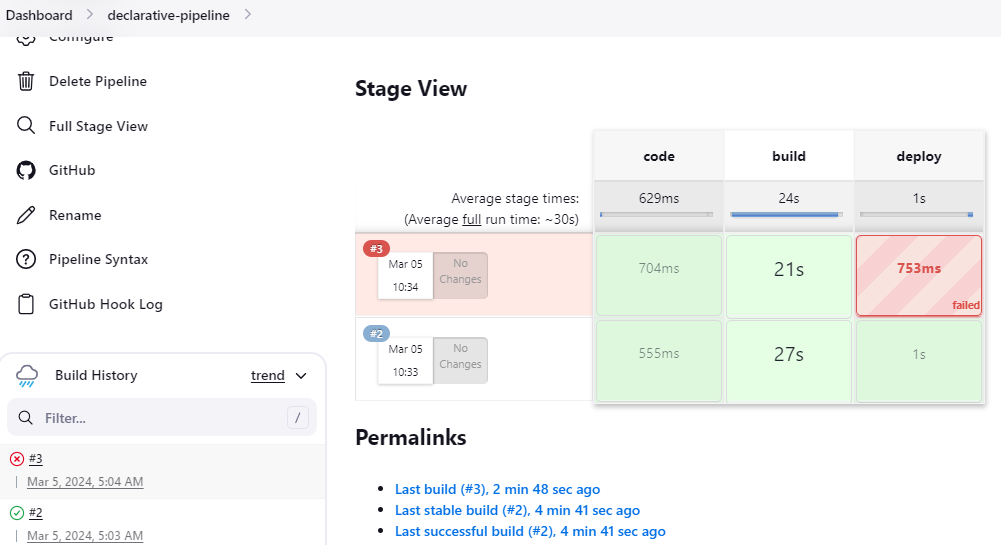
🔹You will face errors(port no. 8000 is already allocated) in case of running a job twice, as the docker container will be already created, so for that do task 2.
So, remove/ delete your 1st image using command sudo docker rmi <img-id> --force
🕹Task 2: Enhance Pipeline with Docker Groovy Syntax
- Create a docker-integrated Jenkins declarative pipeline using the
dockergroovy syntax inside the stage block.
🔹Now you just go back to the configuration of your pipeline job.
🔹Modify the Pipeline Script.
pipeline {
    agent any

    stages {
        stage("code") {
            steps {
                git url: "https://github.com/mandgepratik/node-todo-cicd.git", branch: "master"
                echo "code cloned successfully"
            }
        }

         stage("build and test"){
            steps{
                sh "docker build -t node-app-test-new ."
                echo 'Code Build Successfully'
            }
        }

        stage("deploy") {
            steps {
                sh "docker-compose down && docker-compose up -d"
                echo "Node-app deployed successfully"
            }
        }
    }
}
🔹Remove port no. 8000 from Security groups.
🔹Save & Run once again.
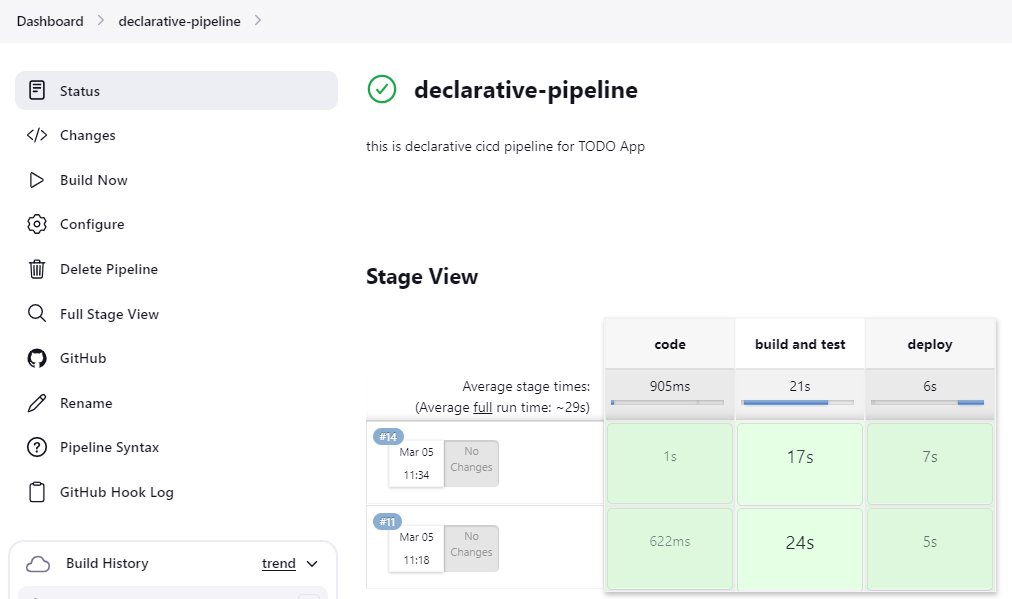
🔹Congratulations, your pipeline is running successfully.🎊
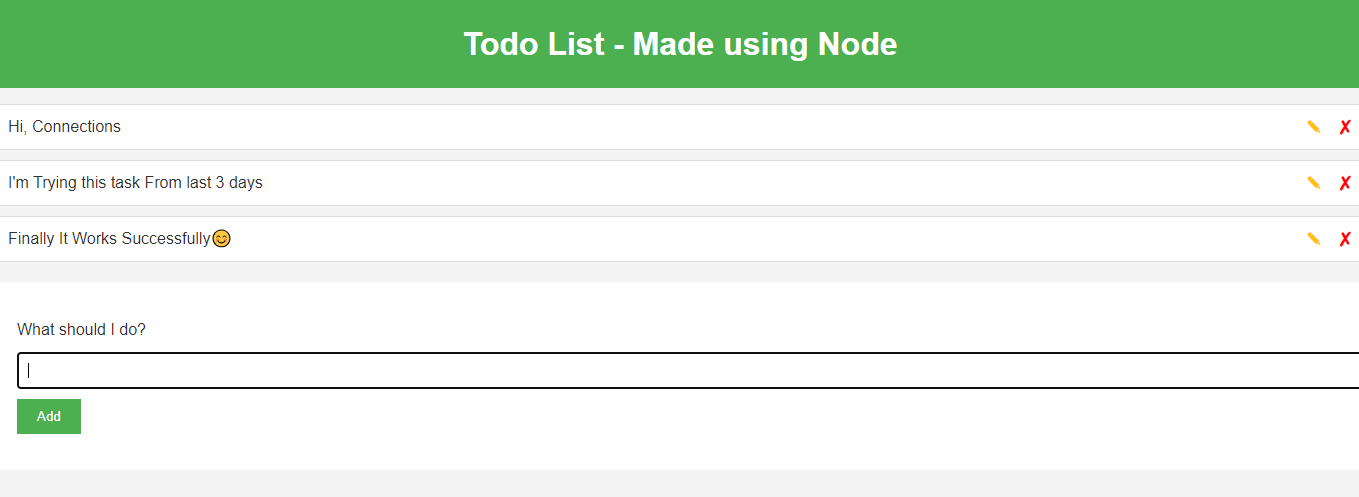
🔹Then check your application, use your EC2 public-ip:8000
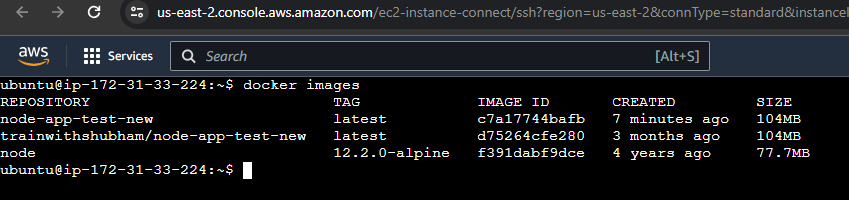
🔹You can check on your terminal, You'll get latest image of your repository.
🌌Conclusion
In conclusion, using a declarative CI/CD pipeline with Docker commands in Groovy syntax offers a streamlined and efficient way to automate your build, test, and deployment processes. By defining your pipeline stages and steps within a Jenkinsfile, you can easily manage and version control your CI/CD workflow.
I believe this blog will be really helpful, giving you fresh perspectives and teaching you something new and interesting. 🙏
😊 Enjoy learning!


