♾Securing the Future: A DevSecOps Project
We are going to variety of tools that are essential in the world of DevOps.

Hey there! 👋
I'm Pratik R. Mandge, a DevOps Engineer passionate about all things AWS DevOps Technology. Currently on a learning adventure, I'm here to share my journey and Blog's in the world of cloud and DevOps.
🛠️ My focus? Making sense of AWS services, improving CI/CD, and diving into infrastructure as code. Whether you're fellow interns or curious enthusiasts, let's grow together in the vibrant DevOps space.
🌐 Connect with me for friendly chats, shared experiences, and learning moments. Here's to embracing the learning curve and thriving in the exciting world of AWS DevOps Technology!
Follow me on LinkedIn: https://www.linkedin.com/in/pratik-mandge363
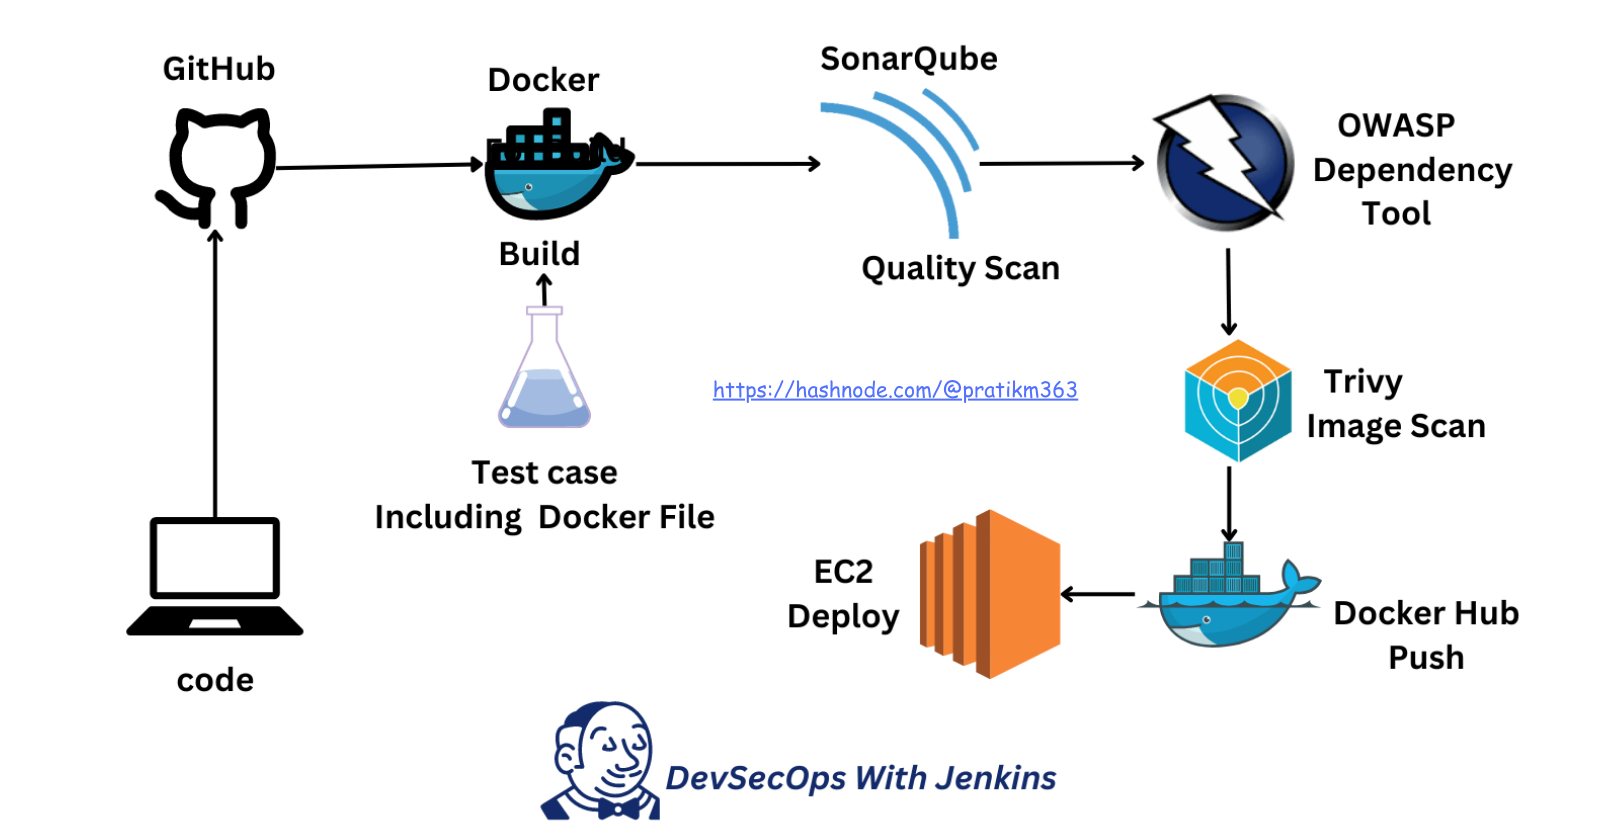
🔹Flow of DevSecOps Project
🔹Prerequisite Tools:
AWS Ubuntu: "AWS Ubuntu refers to the Ubuntu operating system instances that are hosted on the Amazon Web Services cloud platform."
GitHub: "GitHub is a web-based platform for version control using Git, commonly used for hosting and sharing code repositories."
Docker: "Docker is a platform for developing, shipping, and running applications using containerization."
Docker-compose: "Docker Compose is a tool for defining and running multi-container Docker applications."
Jenkins CI/CD: "Jenkins CI/CD is an automation server used for continuous integration and continuous deployment pipelines."
SonarQube: "SonarQube is an open-source platform for continuous inspection of code quality."
OWASP: "OWASP (Open Web Application Security Project) is a non-profit organization dedicated to improving software security."
Trivy: "Trivy is a vulnerability scanner for containers and other artifacts, focusing on simplicity and ease of use."
These tools will help us streamline our development processes while ensuring security throughout.
🔹Now Let's start the Project
◼️Set EC2 Instance:
Instance Type - minimum t2.large & minimum Volume 10 GB.
◼️Install Openjdk 17-jre:
To run Jenkins, you need to have Java installed on your machine.
sudo apt update
sudo apt install fontconfig openjdk-17-jre
java -version
◼️Install Jenkins:
Long Term Support Release
sudo wget -O /usr/share/keyrings/jenkins-keyring.asc \
  https://pkg.jenkins.io/debian-stable/jenkins.io-2023.key
echo deb [signed-by=/usr/share/keyrings/jenkins-keyring.asc] \
  https://pkg.jenkins.io/debian-stable binary/ | sudo tee \
  /etc/apt/sources.list.d/jenkins.list > /dev/null
sudo apt-get update
sudo apt-get install jenkins
◼️Now enable, start and verify the Jenkins service with below command:
sudo systemctl enable jenkins
sudo systemctl start jenkins
sudo systemctl status jenkins
◼️Install Docker and docker-compose:
sudo apt-get install docker.io docker-compose -y
◼️Add Current User & jenkins into docker group:
sudo usermod -aG docker $USER
sudo usermod -aG docker jenkins
◼️Once reboot your instance:
sudo reboot
◼️Check current user & jenkins added in docker group:
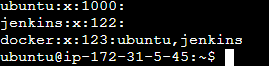
sudo cat /etc/group # To check the users added in docker group
◼️Install SonarQube:
To start a Docker container running SonarQube Community Edition in the LTS (Long Term Support) version.
docker run -itd --name sonarqube-server -p 9000:9000 sonarqube:lts-community
◼️Install Trivy:
sudo apt-get install wget apt-transport-https gnupg lsb-release
wget -qO - https://aquasecurity.github.io/trivy-repo/deb/public.key | sudo apt-key add -
echo deb https://aquasecurity.github.io/trivy-repo/deb $(lsb_release -sc) main | sudo tee -a /etc/apt/sources.list.d/trivy.list
sudo apt-get update
sudo apt-get install trivy
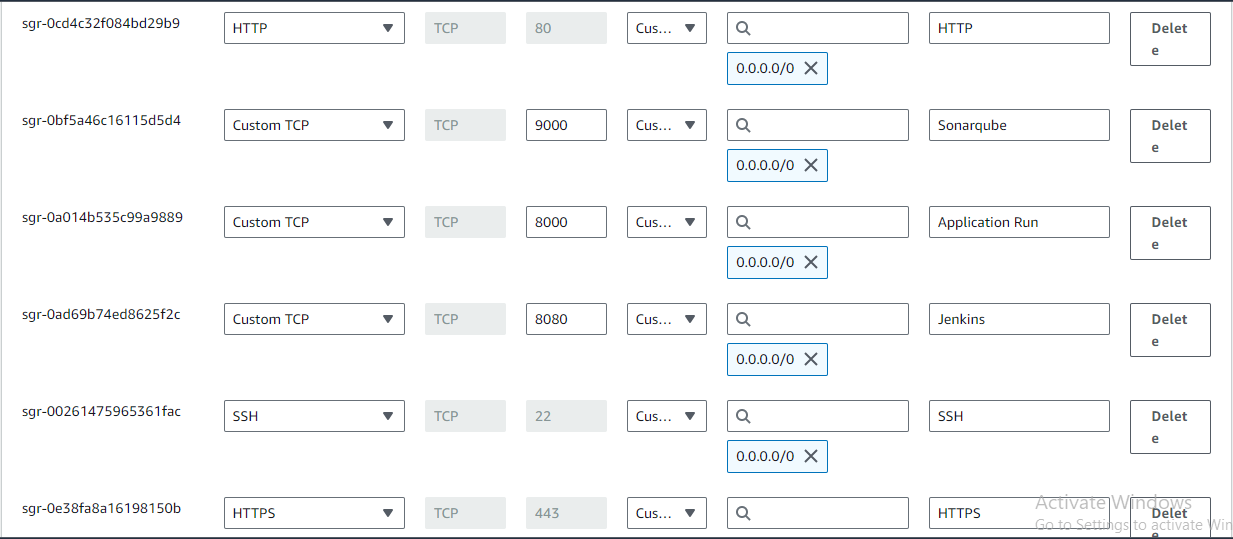
◼️Now add the Ports shown below:
Go to Instance Security-> Security Groups-> Edit Inbound Rules-> Add Rules
For Jenkins: 8080, For SonarQube: 9000, For Docker: 8000
◼️Access Jenkins Server: With url as http://<publicIP>:8080
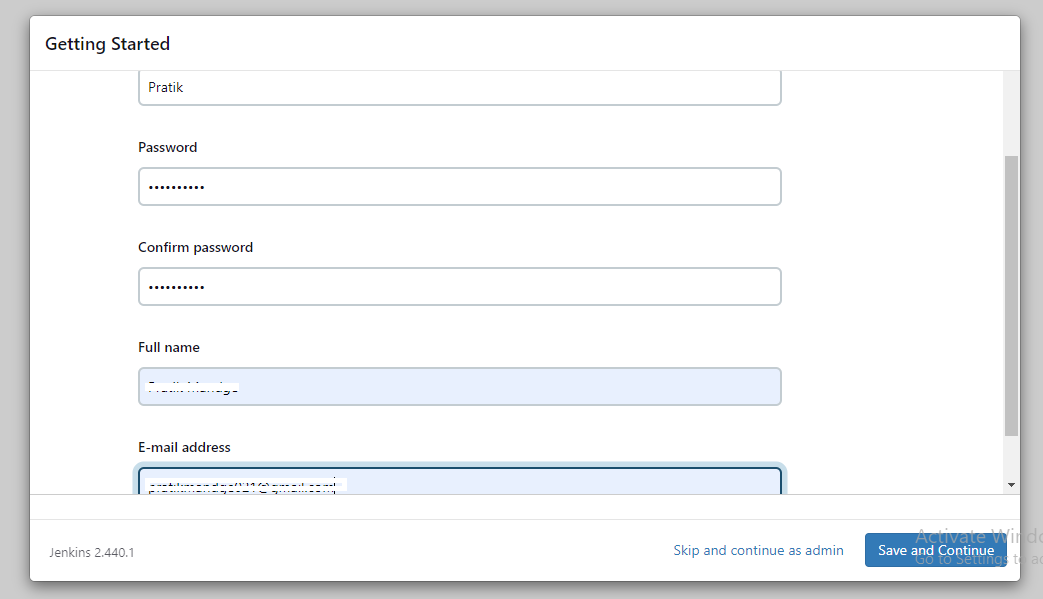
After acess jenkins-> Select suggested plugins.
After Installation you'll get path: /var/lib/jenkins/secrets/initialAdminPassword
Just copy that directory path and paste it in EC2 terminal using cat:
sudo cat /var/lib/jenkins/secrets/initialAdminPassword
◼️Copy the password and paste to jenkins. & Create your Jenkins account.
◼️Install SonarQube, OWASP, Docker plugins in Jenkins below:
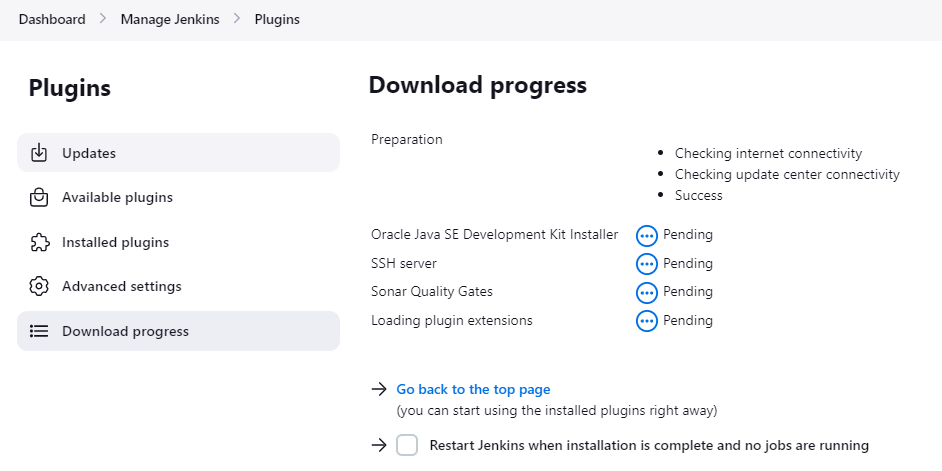
Plugins - SonarQube Scanner, Sonar Quality Gates, OWASP Dependency-Check, Docker.
◼️Access SonarQube Server: To access server just use http://<publicIP>:9000
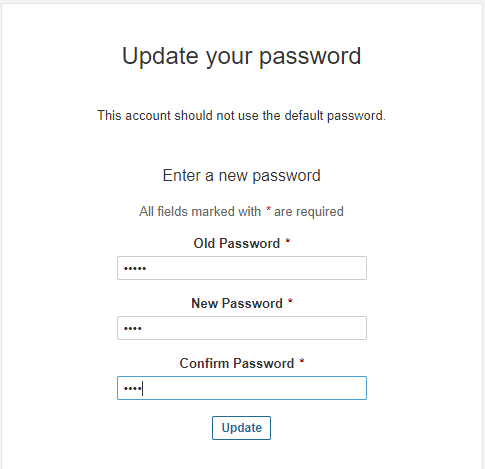
Initially username and password will be ‘ admin’ , ’ admin’. Just change with a new password.
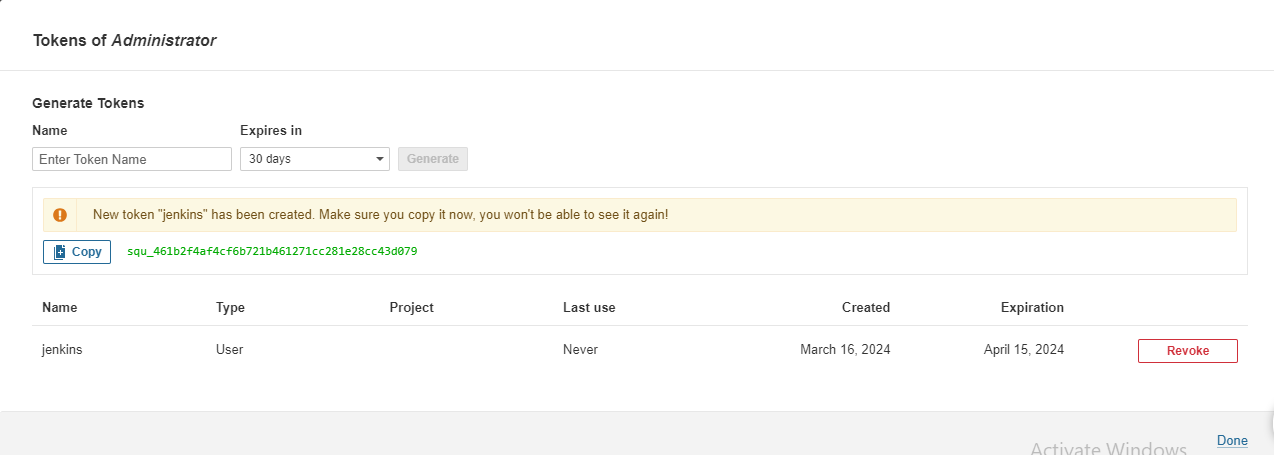
◼️Create users token in SonarQube: Generate a token for authentication purposes. Click on Administration tab-> Security-> Users-> create Token name as jenkins.
Whatever token generated, just copy and paste to somewhere else. Once window is closed, you wont be able to see that again.
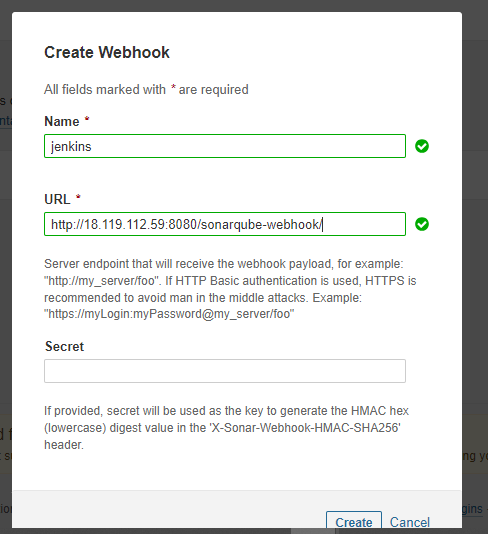
◼️Create a webhook in SonarQube: Administration-> Configuration-> Webhook-> Create
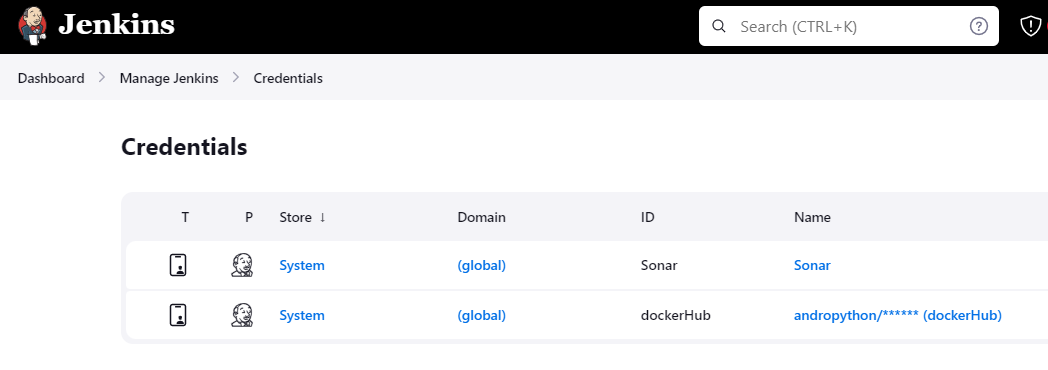
◼️Now Add SonarQube Credentials to Jenkins:
Manage Jenkins-> Credentials-> Add SonarQube Credential
Kind -Secret Text
Scope- Global (Jenkins nodes..)
Secret- Token generated from sonarqube.
ID- Sonar
Description- Sonar
◼️Also Add DockerHub Credentials:
Kind- ‘Username with Password‘
Scope- Global (Jenkins nodes..)
Username- your DockerHub Username
Password- your DockerHub Password
ID- dockerHub
Description- DockerHub Credentials.
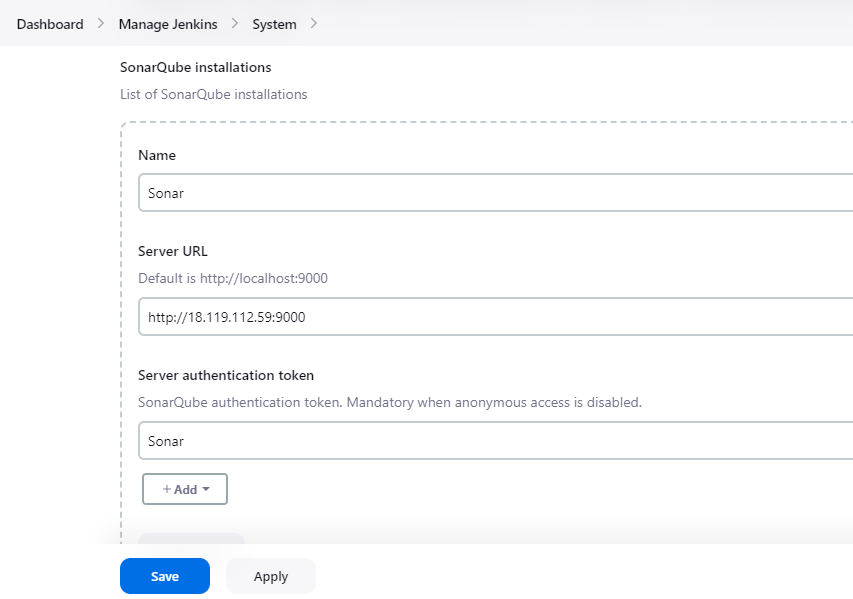
◼️Add SonarQube in Jenkins:
Manage Jenkins-> System-> SonarQube Servers-> SonarQube Installations
Server URL:http://ipaddress:9000
Server authentication token: Sonar
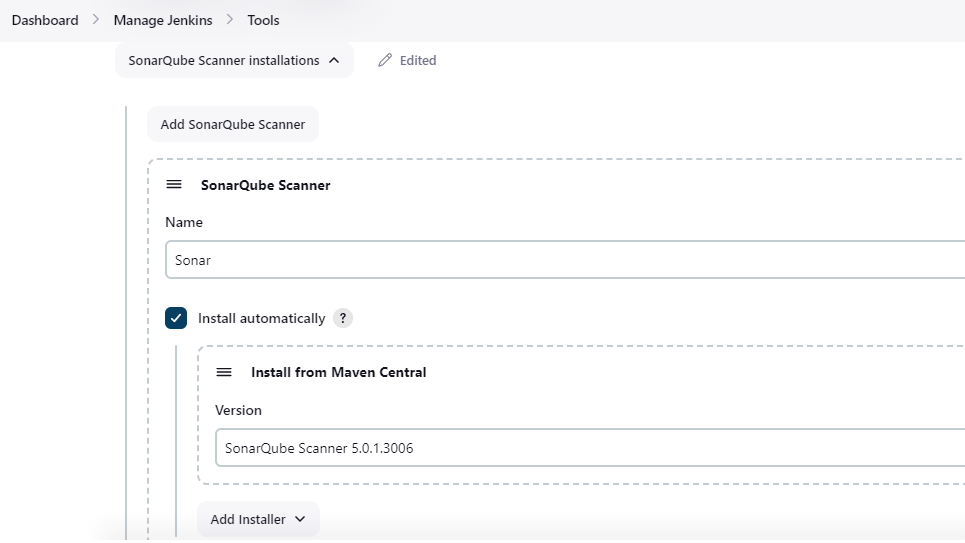
◼️Add SonarQube Scanner from tools:
Manage Jenkins-> Tools-> SonarQube Scanner
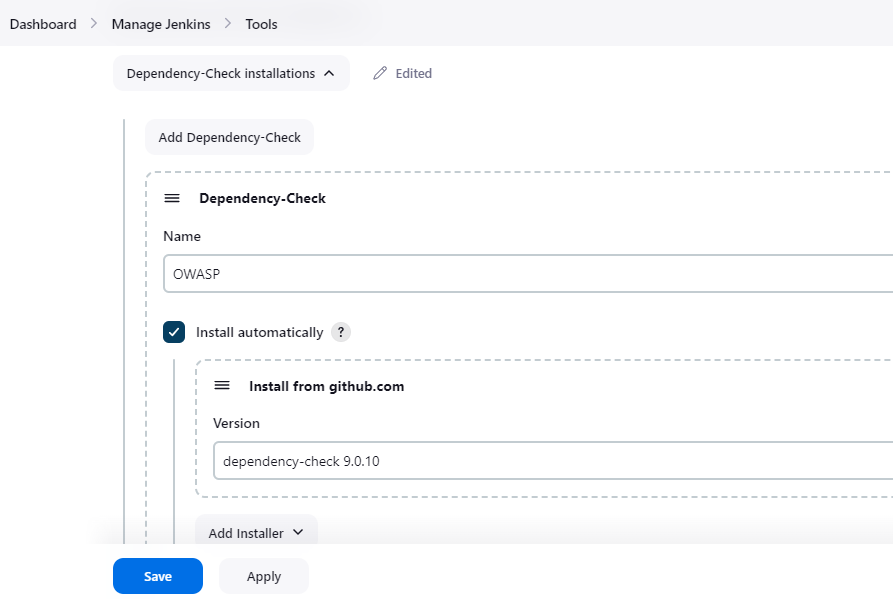
◼️Add OWASP from tools:
Manage Jenkins-> Tools-> Dependency-Check installations
Select Install from Github.com and it will take version
◼️Build Pipeline:
New Item-> (Enter Project Name)-> Select Pipeline-> OK
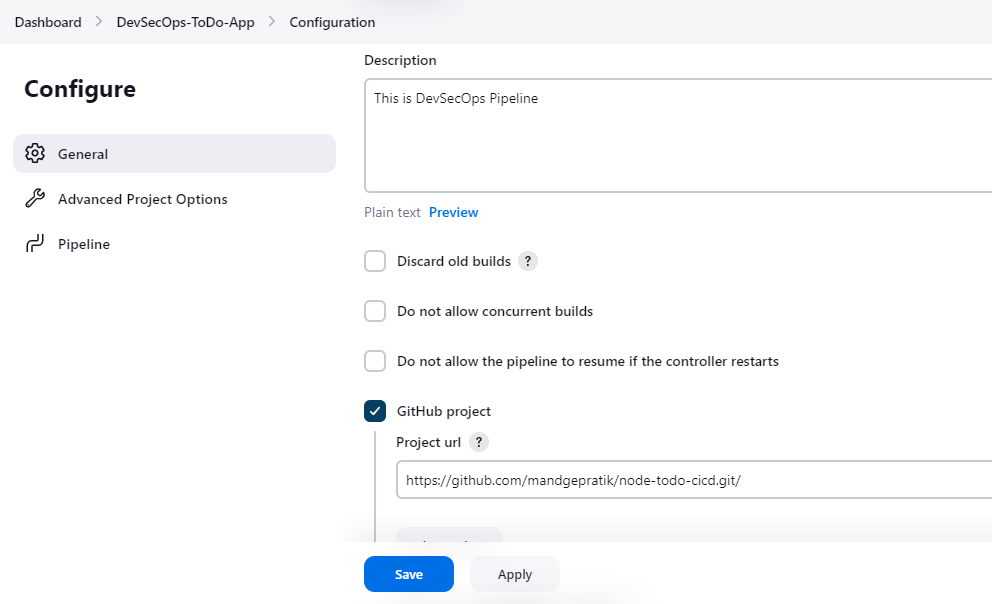
Configuration-> GitHub Project(Github url)-> Build Trigger(Github hook trigger)
Select Pipeline script-> Paste Pipeline Syntax.
pipeline {

    agent any
     environment{
        SONAR_HOME = tool "Sonar"
    }
    stages {

        stage("Code"){
            steps{
                git url: "https://github.com/mandgepratik/node-todo-cicd.git" , branch: "master"
                echo "Code Cloned Successfully"
            }
        }
        stage("SonarQube Analysis"){
            steps{
               withSonarQubeEnv("Sonar"){
                   sh "$SONAR_HOME/bin/sonar-scanner -Dsonar.projectName=nodetodo -Dsonar.projectKey=nodetodo -X"
               }
            }
        }
        stage("SonarQube Quality Gates"){
            steps{
               timeout(time: 1, unit: "MINUTES"){
                   waitForQualityGate abortPipeline: false
               }
            }
        }
        stage("Build & Test"){
            steps{
                sh 'docker build -t node-app:latest .'
                echo "Code Built & Test Successfully"
            }
        }
        stage("OWASP"){
            steps{
                dependencyCheck additionalArguments: '--scan ./', odcInstallation: 'OWASP'
                dependencyCheckPublisher pattern: '**/dependency-check-report.xml'
            }
        }
        stage("Trivy"){
            steps{
                sh "trivy image node-app"
                echo "Image Scanned Successfully"
            }
        }
       stage("Push to Private Docker Hub Repo"){
            steps{
                withCredentials([usernamePassword(credentialsId:"dockerHub",passwordVariable:"dockerPass",usernameVariable:"dockerUser")]){
                sh "docker login -u ${env.dockerUser} -p ${env.dockerPass}"
                sh "docker tag node-app:latest ${env.dockerUser}/node-app:latest"
                sh "docker push ${env.dockerUser}/node-app:latest"
                }

            }
        }
        stage("Deploy"){
            steps{
                sh "docker-compose down && docker-compose up -d"
                echo "App Deployed Successfully"
            }
        }
    }
}
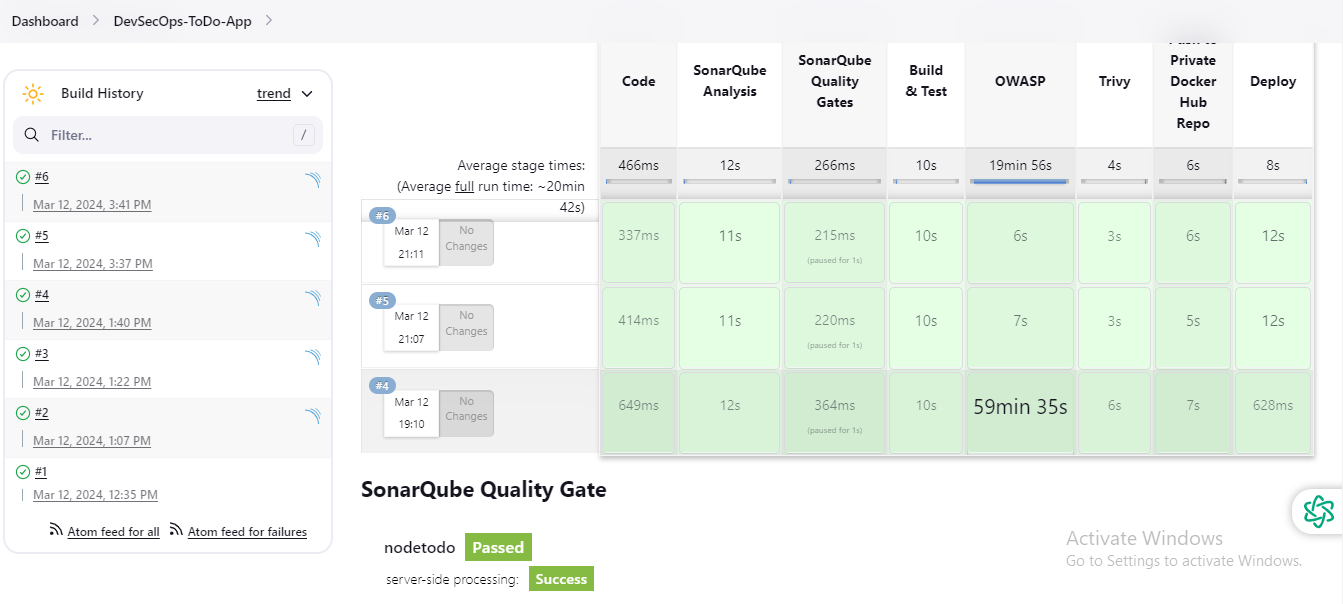
◼️Save & Build Now
The Stages Box sequence will show as per your code.
◼️To access App:PublicIP:8000
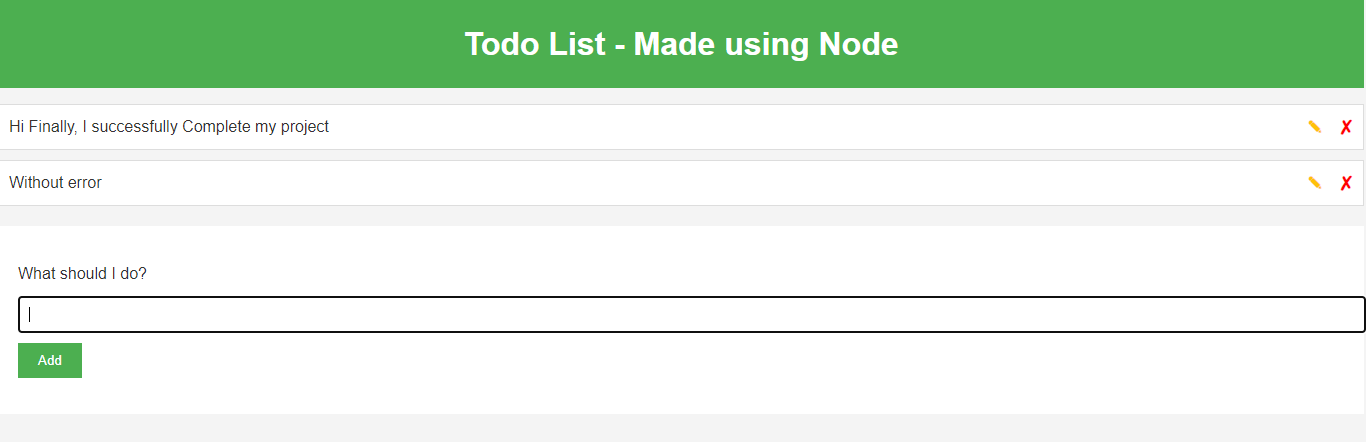
🎊Congratulations!!! You have done it...
📌If you find any issue during the execution of this project, let me know on LinkedIn.
Happy Learning😊


